In this post, we’ll show you how to add emojis to ZingGrid data cells 🔥 . To do this, we define a custom renderer which is a function that lets you transform the data of a given column into specific HTML that you define. Consider the following existing ZingGrid HTML, used for a habit tracking application, with 3 columns:
<zing-grid caption="Log Habit" editor="modal" layout="row" layout-controls="disabled" viewport-stop>
<zg-colgroup>
<zg-column type="custom" header="Log Habit">
<zg-button class="log-button">
<zg-icon name="submitrecord"></zg-icon>
</zg-button>
</zg-column>
<zg-column index="habit"></zg-column>
<zg-column index="streak" renderer="render_streak">
</zg-column>
<zg-column type="custom" header="Delete Habit" editor="false">
<zg-button action="removerecord">
<span>Delete Habit</span>
</zg-button>
</zg-column>
</zg-colgroup>
</zing-grid>
Looking to get a head start on your next software interview? Pickup a copy of the best book to prepare: Cracking The Coding Interview!
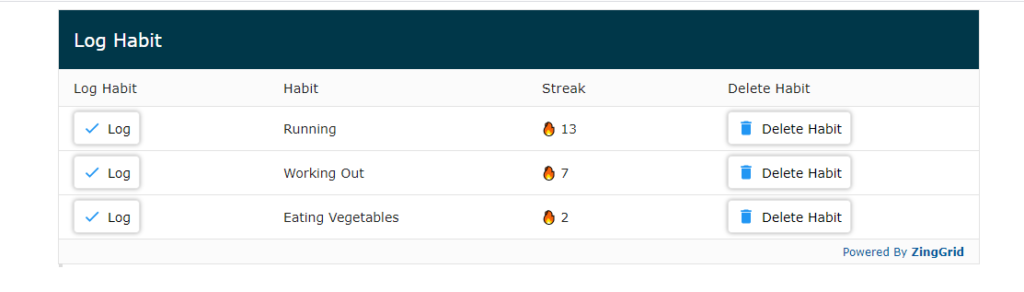
In the bolded column above, we wish to display a fire emoji 🔥 in the streak column. Normally, if our input data was of the form {‘streak’:10} we would only render the number 10 in that column’s data. To add the fire emoji, we override the default renderer by defining the renderer attribute of the column: renderer=”render_streak”. We then define in javascript on the page the render_streak function, which must match the signature below and return the html we wish to display for that column’s data:
<script>
window.render_streak = (streak, DOMCell, $cell) => {
return "🔥 " + String(streak)
}
</script>
We note 🔥 is the html code for the fire emoji 🔥, so we return the emoji as well as the original data (the streak). This results in the following being rendered:
To render your own emoji, you can look up the desired emoji’s hex code and then return it as part of your html string in your renderer. Now you know how to add emojis to ZingGrid!
Elevate your software skills
Ergonomic Mouse |
Custom Keyboard |
SW Architecture |
Clean Code |